
Remove a sewn-on patch
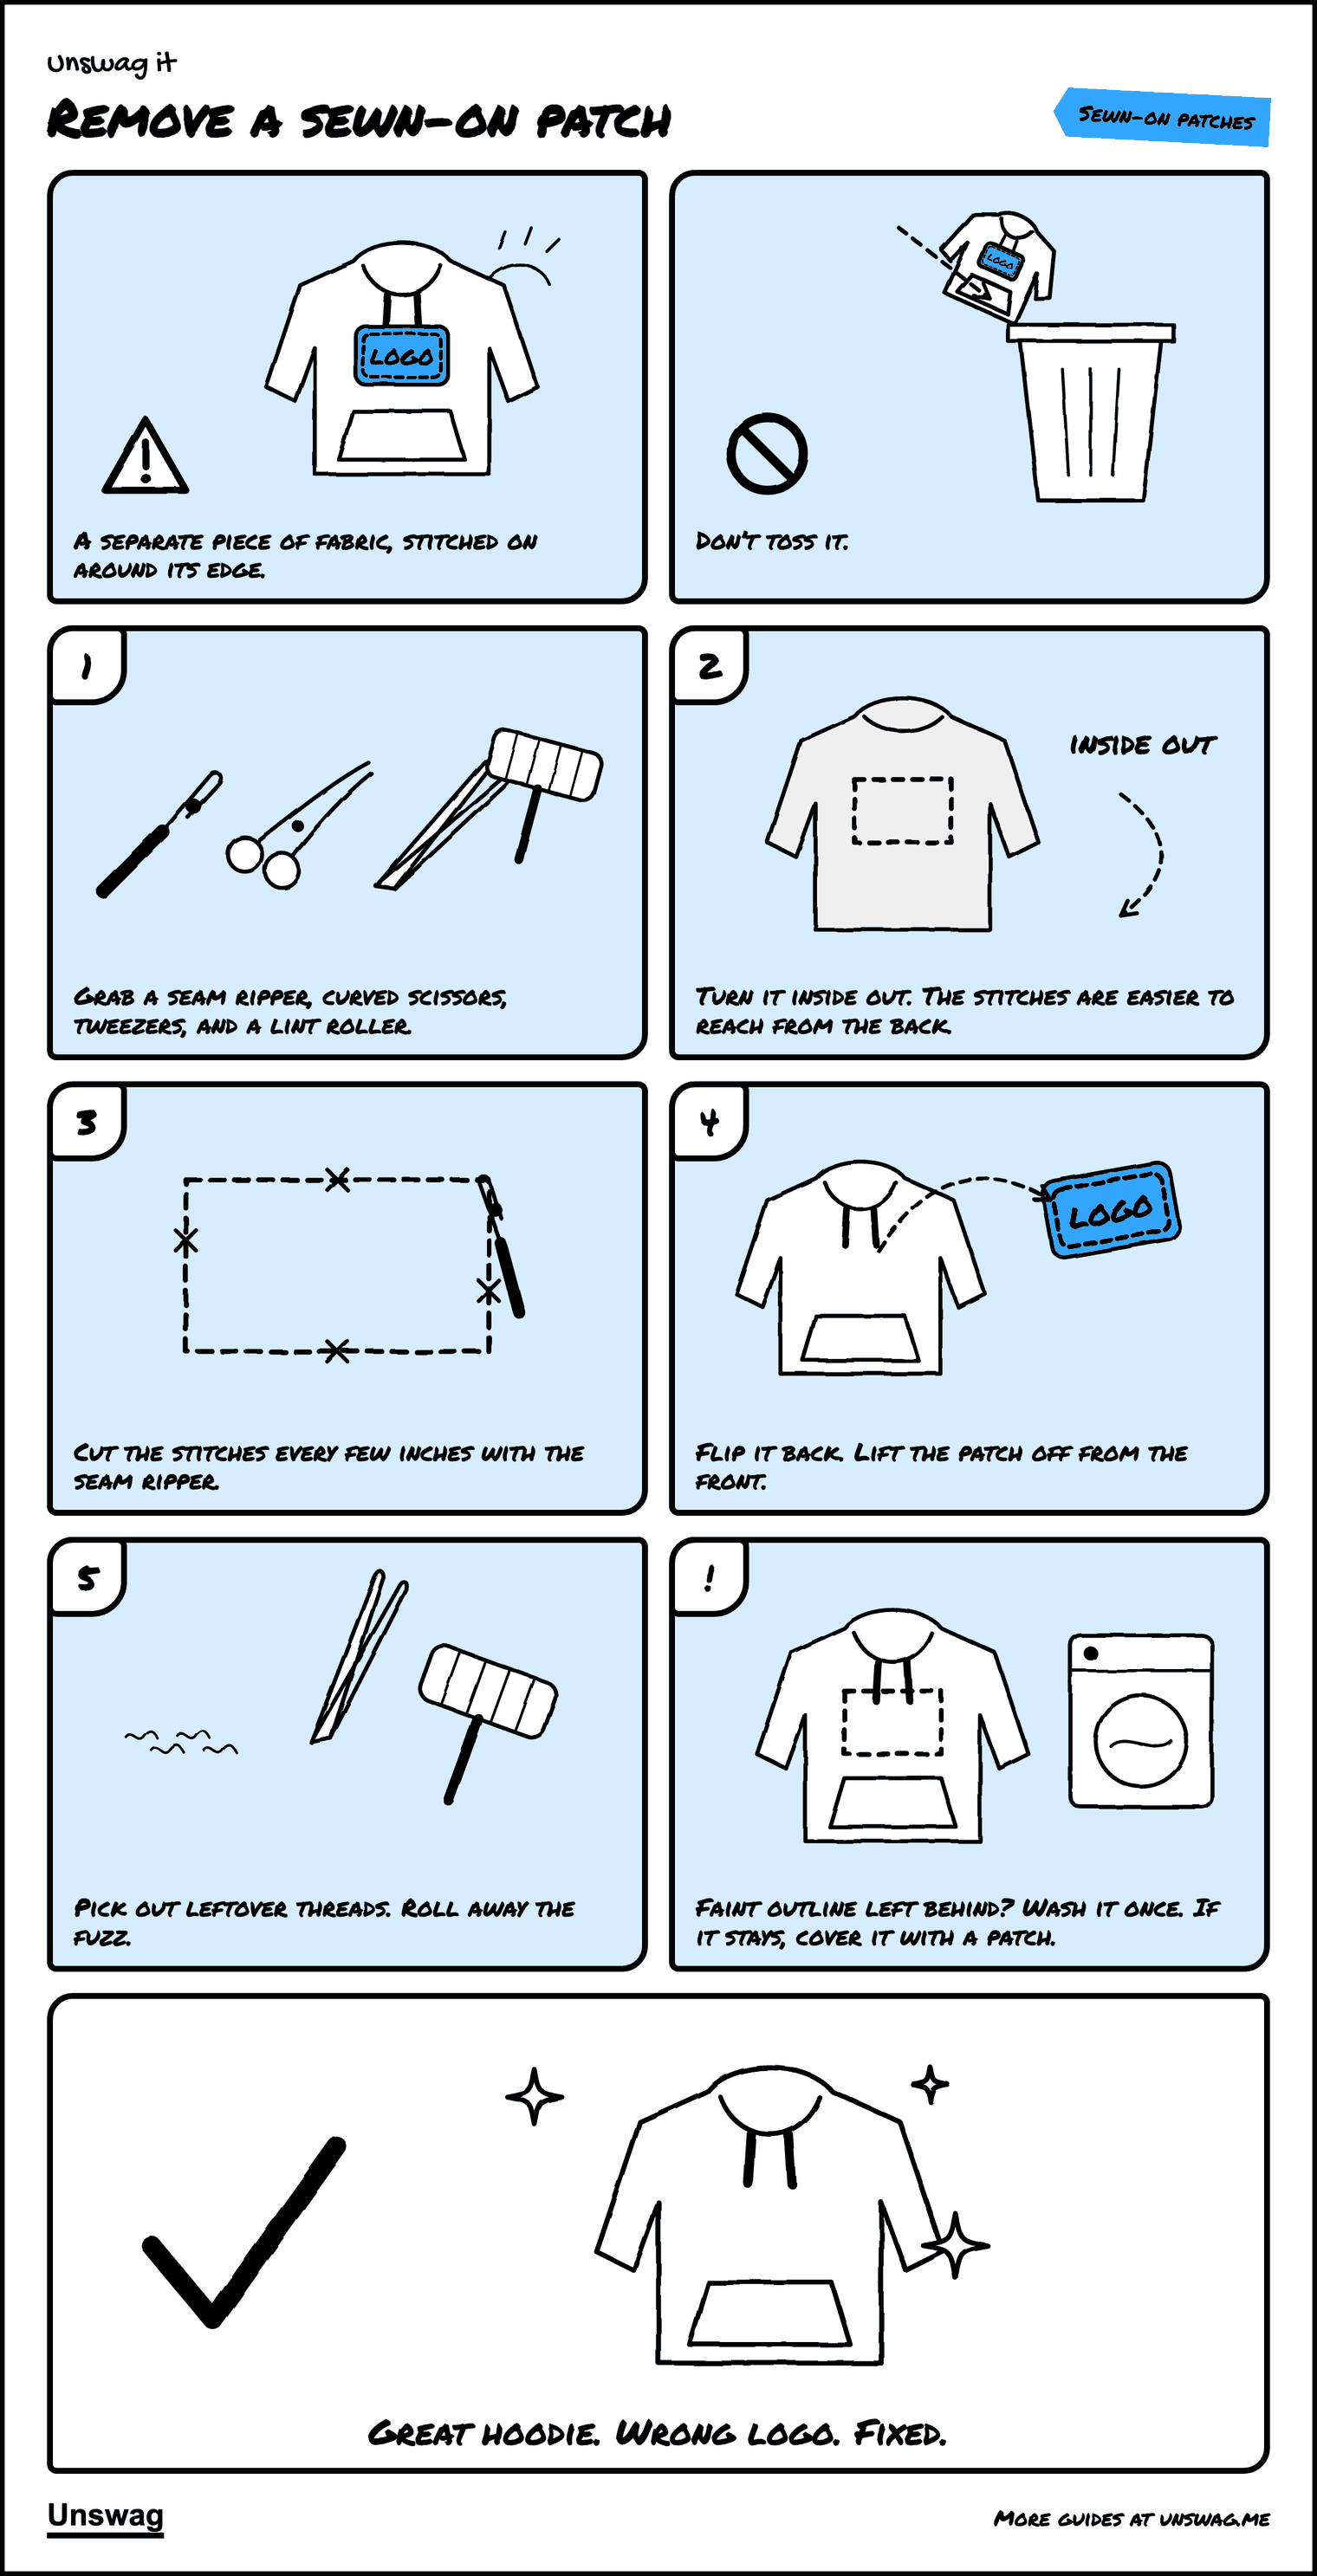
A separate piece of fabric, stitched on around its edge.
REMOVE is the verdict for this kind of logo
What you’ll need
Every fabric, ink, and glue is different. Test on a hidden spot, go slow, and know that removal can damage an item.
Download the PDF Two pages, 393 KB. The pictures, then the written steps.
Written steps
- Grab a seam ripper, curved scissors, tweezers, and a lint roller.
- Turn the item inside out. The patch’s stitches are easier to see and reach from the back.
- Cut the stitches every few inches with the seam ripper. You don’t need to cut every one.
- Turn the item right side out and lift the patch away. Cut any stitches that still hold.
- Tweeze out the leftover threads, then use the lint roller to clean up.
Outline left behind? The fabric under a patch can be less faded than the rest. A wash or two often evens it out. If it doesn’t, a cover-up patch hides it.
Didn’t come off? Cover it.
Logo redacted bar
Patch: 3.5 × 2.25 in.